How to Start a Blog on a Budget – Start your blog for less than $3 per month with Bluehost.
Today you’ll learn how to start a blog on a budget using Bluehost and WordPress. I’m a full-time blogger now and I wake up every day looking forward to what lies ahead!
If you’ve been thinking about starting a blog, don’t continue to put it off. It could be a life-changing decision that gives you the freedom to work from home and do something you truly enjoy doing. Making money is just icing on the cake!
Also, starting a blog doesn’t have to be expensive. Bluehost offers affordable pricing and a free domain. It’s the host I use for my blog and I can’t recommend them enough for someone who wants to start a blog on a budget.
Let’s not delay any further! Here’s your step-by-step tutorial on how to start a blog on a budget.
How to Start a Blog on a Budget
Step 1: Choose Your Hosting Plan
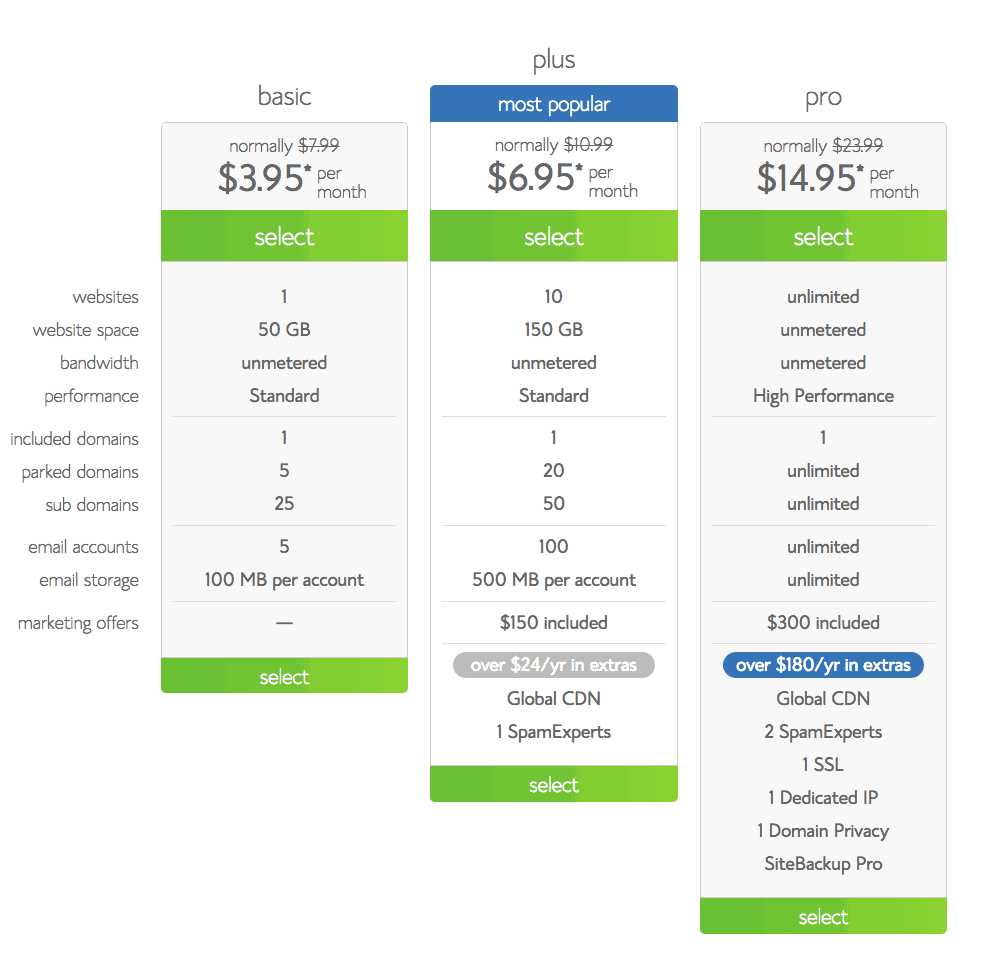
Go to Bluehost.com and select get started. You can choose between three packages. I went with the $3.99 plan and decided to pay for 36 months of hosting all for a total of $126.
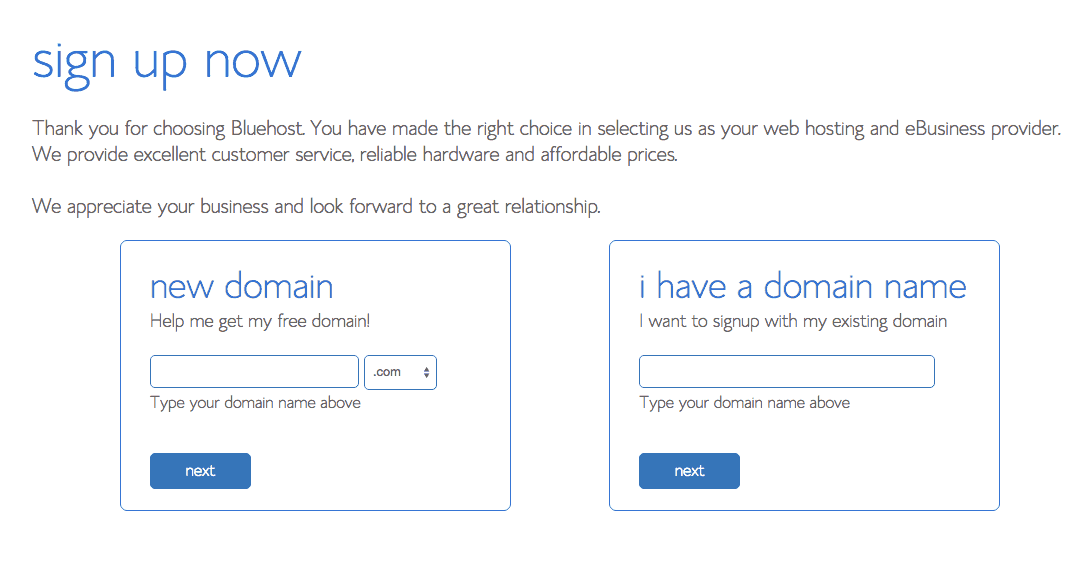
Step 2: Choose Your Domain Name.
Next, you will select your domain name (web address) for your new blog. If you sign up for a 12-month hosting plan using my link, Bluehost is offering free domain registration for a year.
There will be some add-on’s that you can choose. I recommend getting the domain privacy add-on. This will keep your personal information private on the internet.
After choosing your add-on’s, you will enter your billing information and proceed with creating your account with Bluehost.
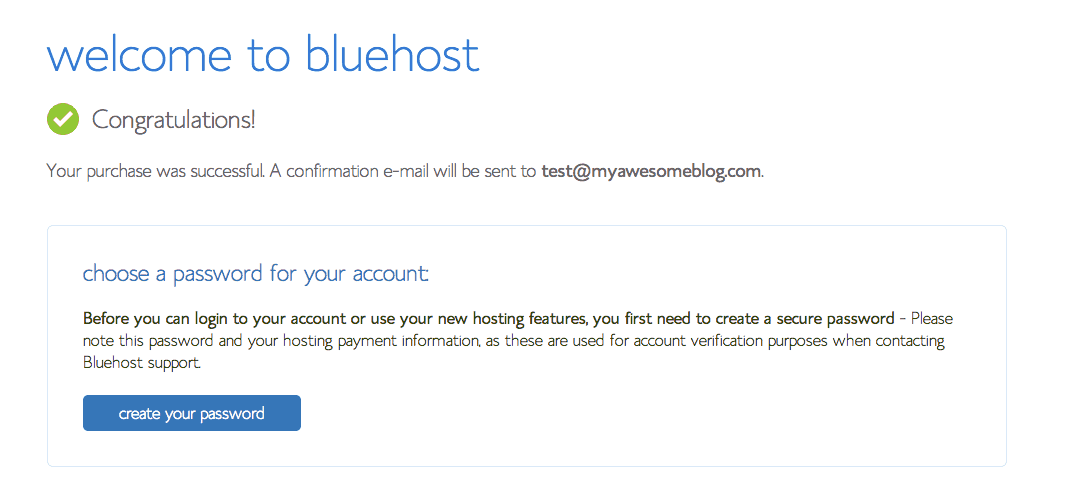
Step 3: Create your Bluehost Account.
Tips for creating your password:
- It’s best to go with the password Bluehost generates. It’s long, hard to remember, and not something that can easily be guessed.
- If you do create your own, do not use anything memorable or common information about yourself.
- Use numbers, special characters, and both lower and uppercase letters.
Step 4: Login To Your New Bluehost Account and Create Your WordPress Blog.
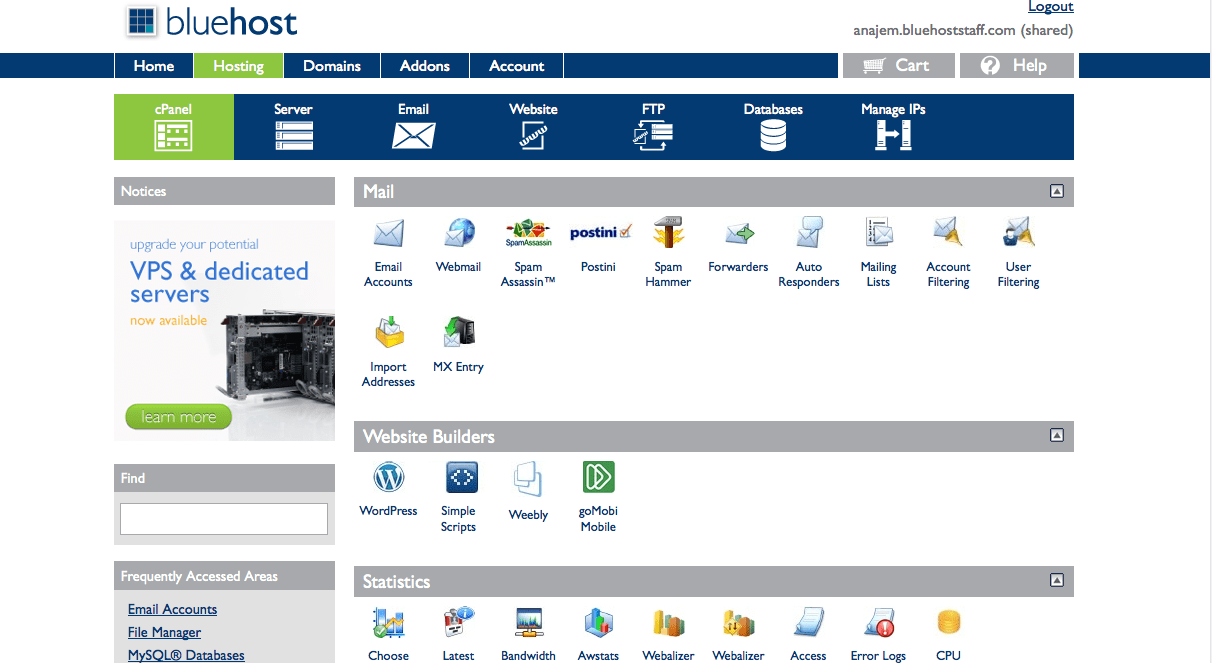
This is what the inside of your Bluehost account should look like:
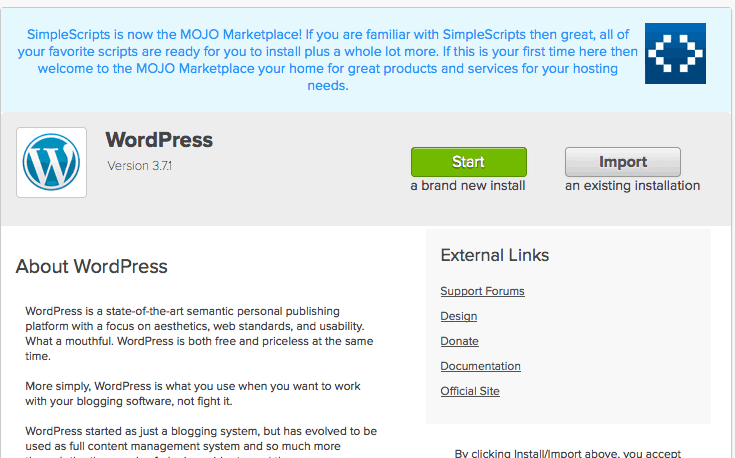
Go to the cPanel in Bluehost (shown above) and click on WordPress (located under Website Builders). Once you click on this, you will see the following image:
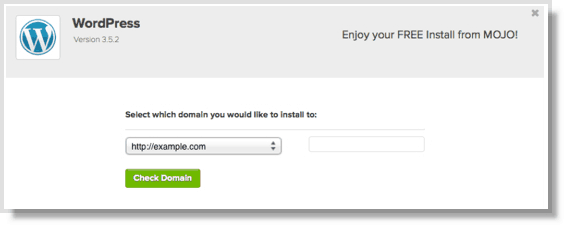
Click start. Next, it will ask you what domain you want to install it on. You will select the domain you chose early. This is your website name. (See image below). Once you select the domain, continue with the installation.
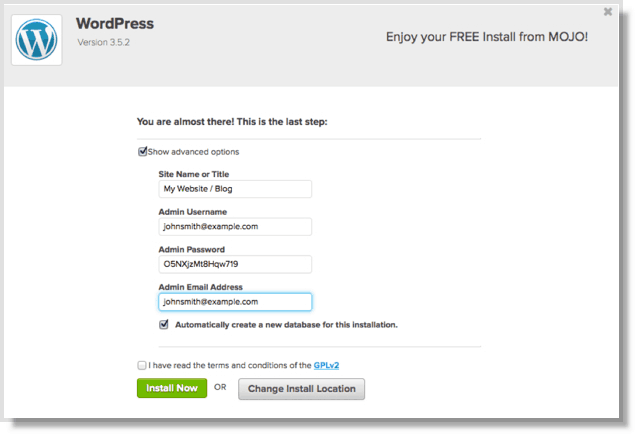
Next, you will go to the last step. This is where you will select your admin name and password to access your new WordPress blog. This is separate from Bluehost. Bluehost is your hosting and WordPress is your blog.
- Now choose advanced options (shown above) and this is where you will create your password and username for your actual site. DON’T choose anything common. Make it hard and use a variety of letters and numbers.
- Select automatically create a new database.
- Click install.
Step 5: Choosing Your Blog Theme.
Now you will need to log into your new WordPress blog using the admin/password you set up during the previous step. To get to your new blog, type in your website address/wp-admin into the internet address bar. It should look something like this (www.yourblogname.com/wp-admin).
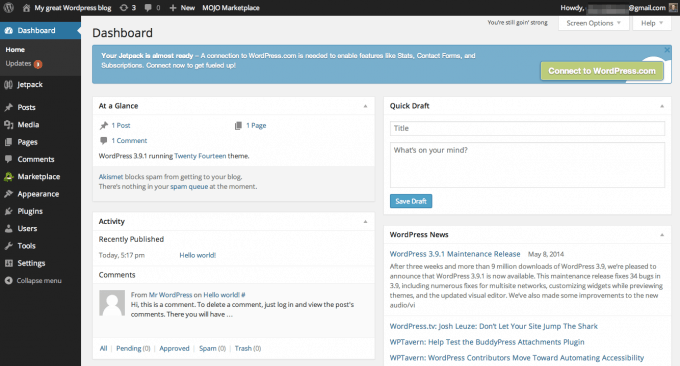
Your theme is the design of your blog. The most popular framework is Genesis through Studiopress. However, I went with one of the cheaper themes in the Marketplace. You will see this when you log into your WordPress account (see below). Or you can go to appearance>>themes and choose one of the free themes already provided.
A stress-free way would be to purchase a theme from an affordable designer and have them install it on your WordPress site for you. For example, Beautiful Dawn Designs has beautiful pre-made themes for $45 and under. You can customize the colors and styles of the themes without messing with any code.
Once you have your theme set up on your blog, you’re finished! Now you can navigate your WordPress dashboard and begin creating posts for your blog.
How to Use Pinterest to Make Money With Your Blog
Once you have set up your blog, I recommend creating ten posts that will establish you as an expert on your topic. Then start promoting them on Pinterest. Pinterest is a great way to grow your blog rather quickly and you can even earn some income while you’re doing it.
Since there’s a lot to this topic, I’ve created a free e-book you can use to help you after you’ve created content and you’re ready to share on Pinterest.
In this e-book, you will learn the following:
- Where to find free images to share on Pinterest.
- What tools you need to create great Pin images.
- How to set up your Pinterest Account for success as a blogger.
- Where to look for group boards.
- How I doubled my traffic using Pinterest.
- A brief introduction to getting started with affiliate marketing so you can grow your income.
Click here to receive a free copy of this e-book.
So, are you ready to start your blog or what? If you have any questions, drop me a line in the comments!
